Draw your study zone
Create custom geographic elements directly on the map using three powerful drawing tools: freehand, circle, and polygon, enabling precise area definition for targeted analysis.
Overview
The Drawing feature provides users with intuitive drawing tools to create custom geographic elements directly on the map interface. This functionality is essential for defining specific areas of interest, study zones, or analysis boundaries when existing geographic data doesn't meet your precise requirements.
Element Creation Methods
You have two main approaches to create new elements:
- Interactive Drawing Tools - Freehand, Circle, Polygon [Element] draw an element demo
- BYOD (Bring Your Own Data) - Geojson or CSV with geographical coordinates
Freehand Drawing Tool
Purpose: Create irregular, custom-shaped zones following natural boundaries
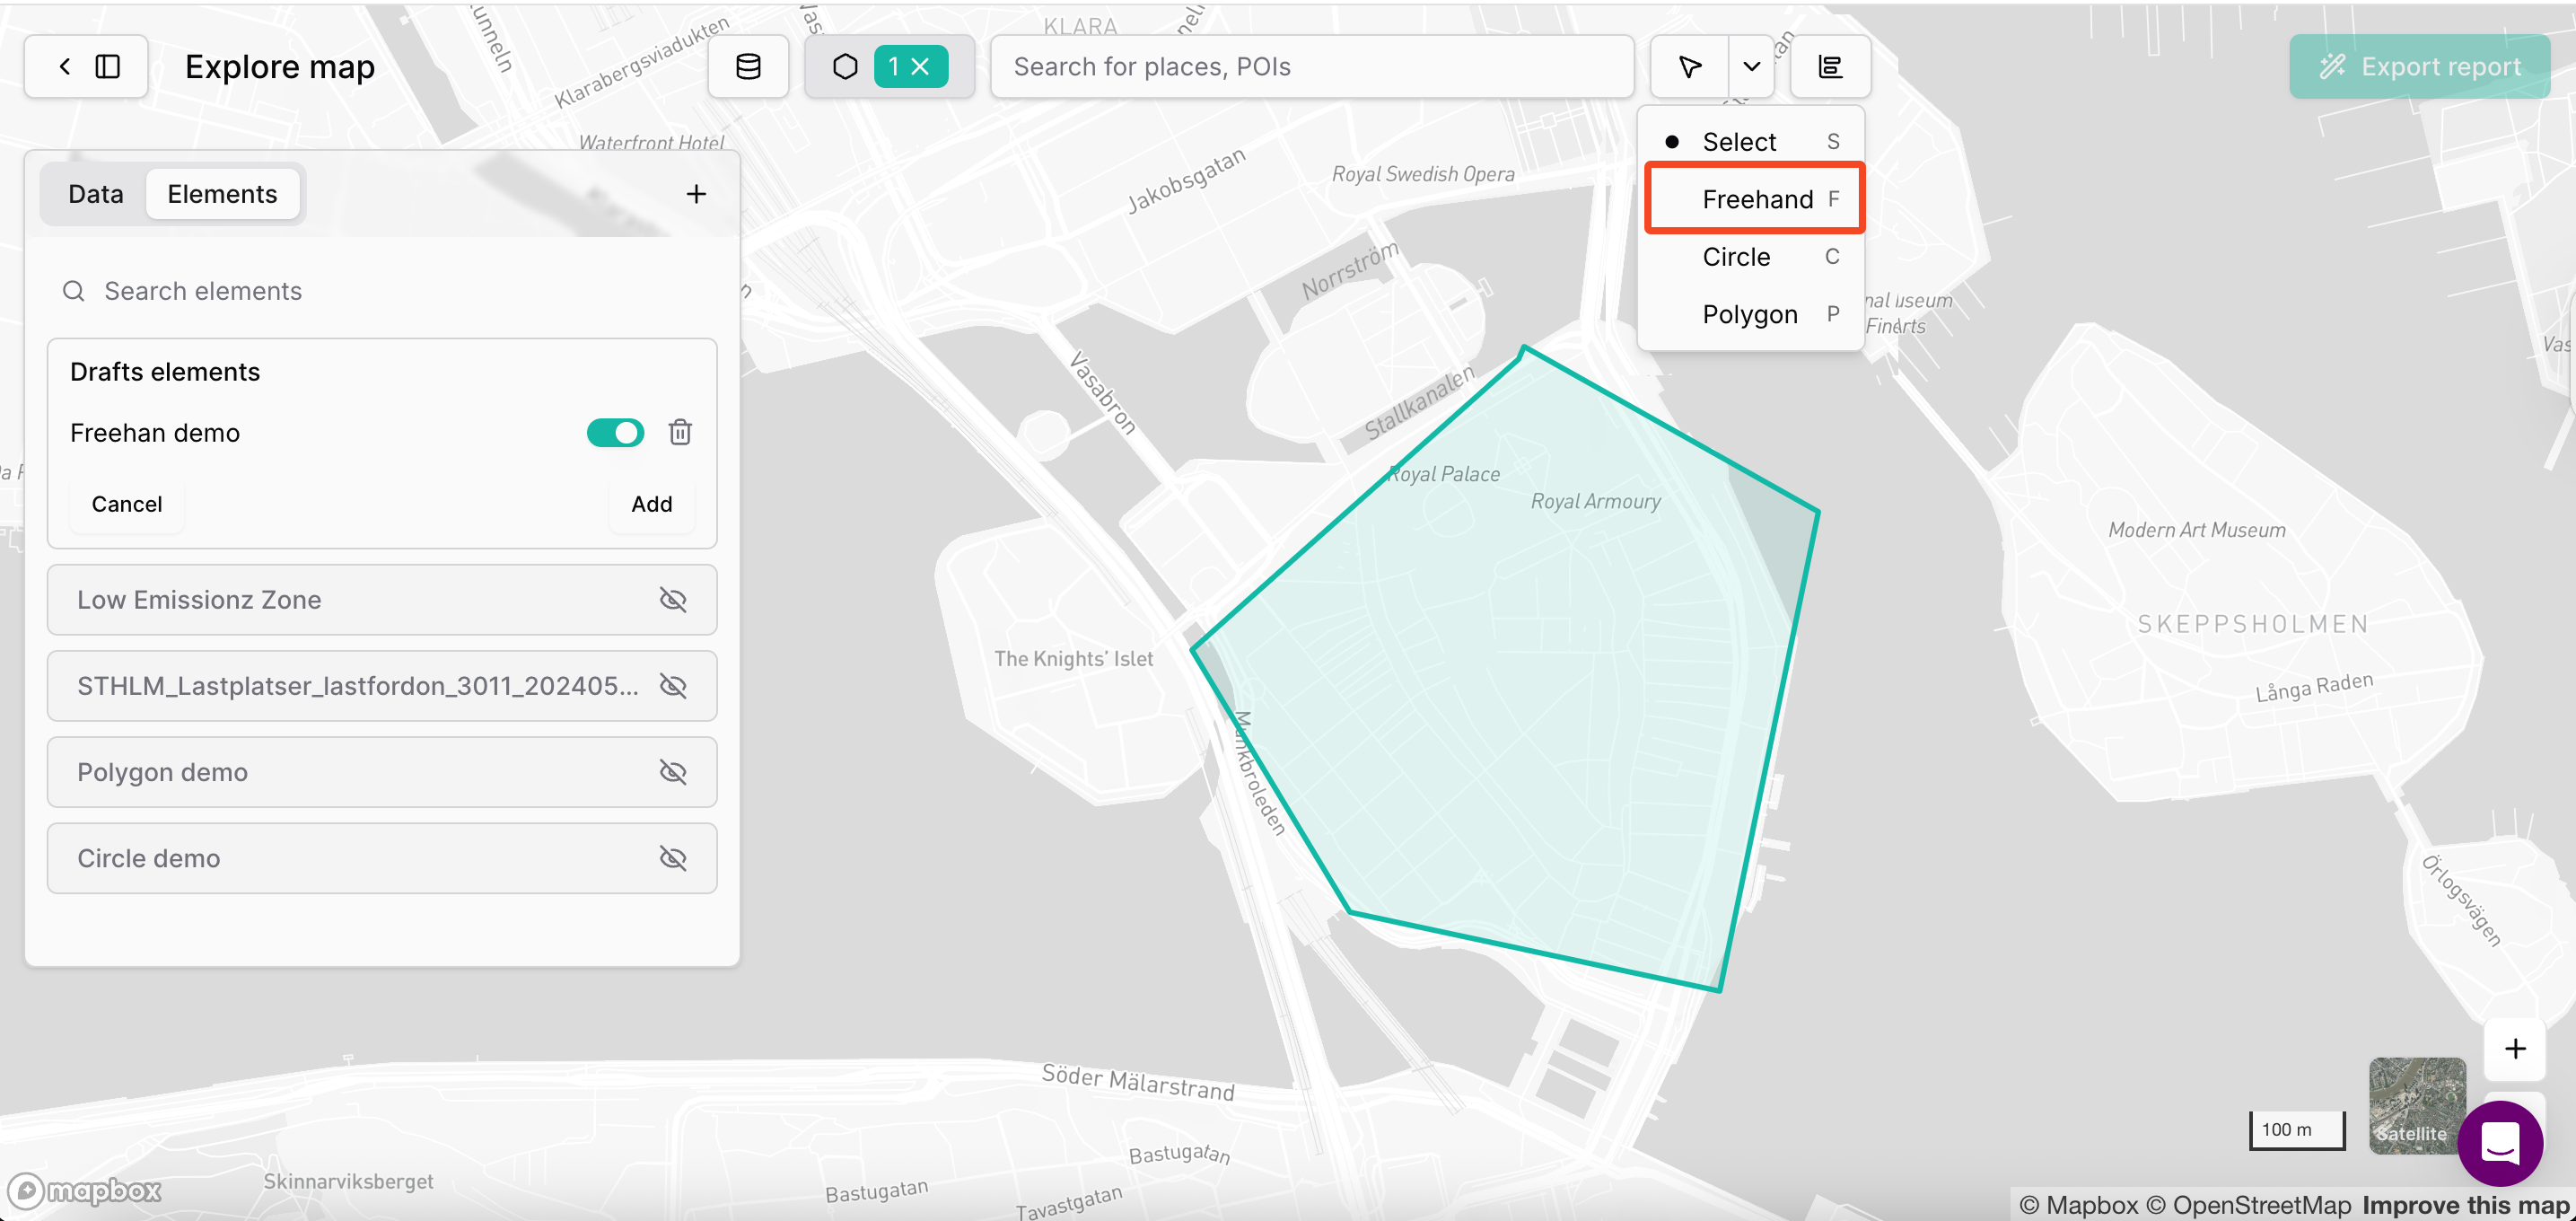
How to Use:
- Select Freehand Tool: Click the freehand icon in the toolbar
- Start Drawing: Click and drag to draw your desired shape
- Follow Boundaries: Trace around specific areas like neighborhoods, natural features, or irregular zones
- Complete Shape: Release to finish the freehand element
- Review and Adjust: Fine-tune the shape if needed
Circle Drawing Tool
Purpose: Create circular analysis zones with defined radius
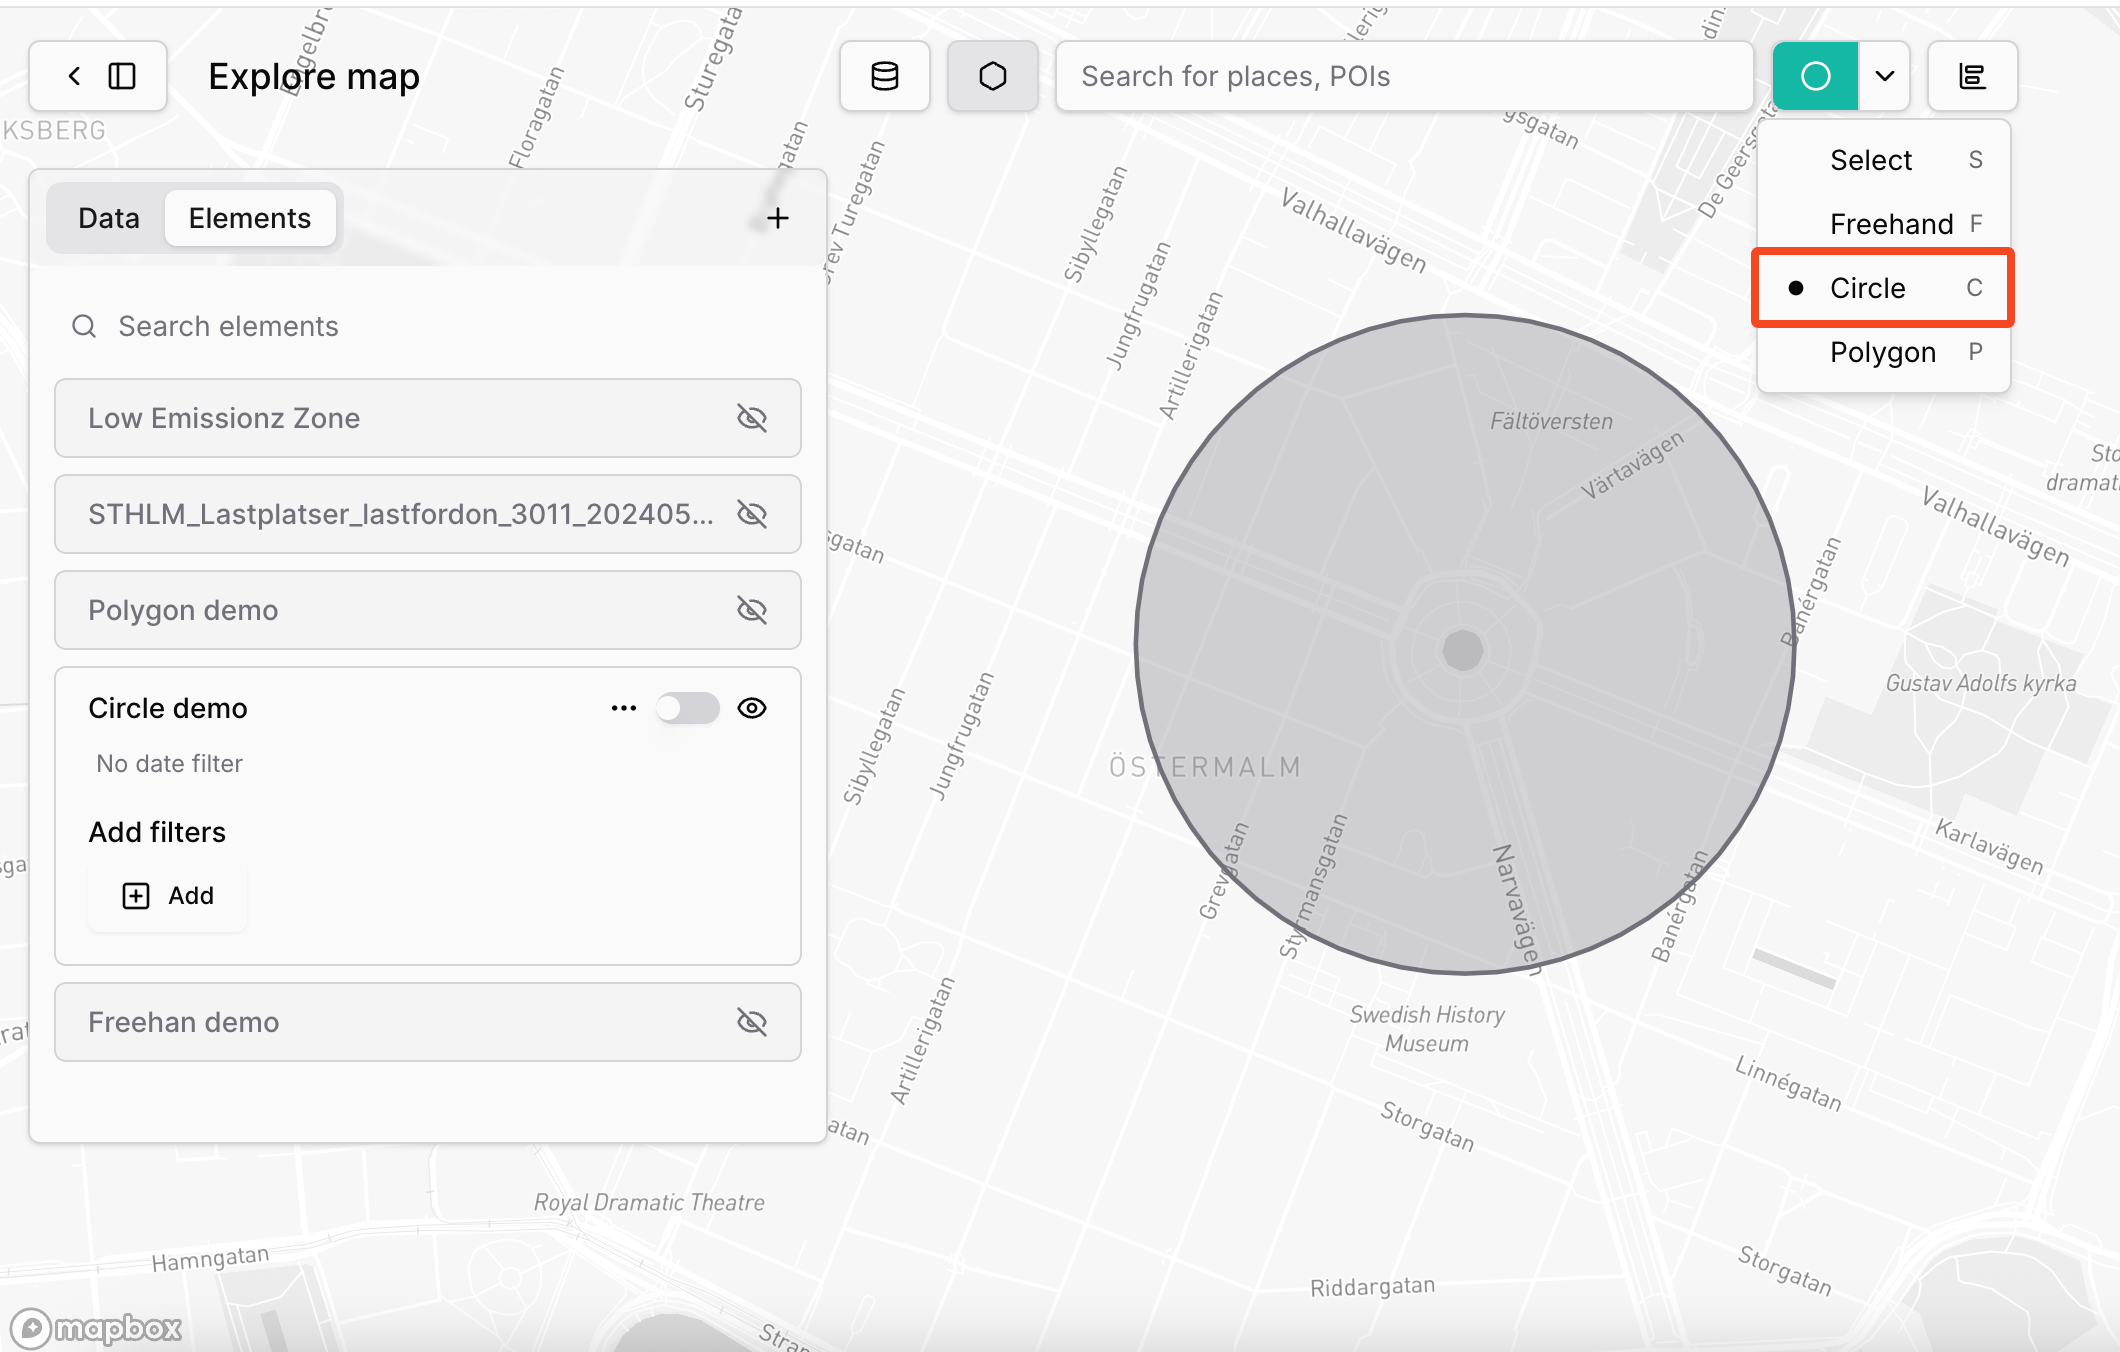
How to Use:
- Select Circle Tool: Click the circle icon in the toolbar
- Set Center Point: Click on the map where you want the circle center
- Define Radius: Drag outward to set the desired circle size
- Confirm Size: Release when the circle covers your target area
- Name Element: Provide descriptive name (e.g., "Demo Circle")
Polygon Drawing Tool
Purpose: Create precise multi-sided shapes with defined vertices
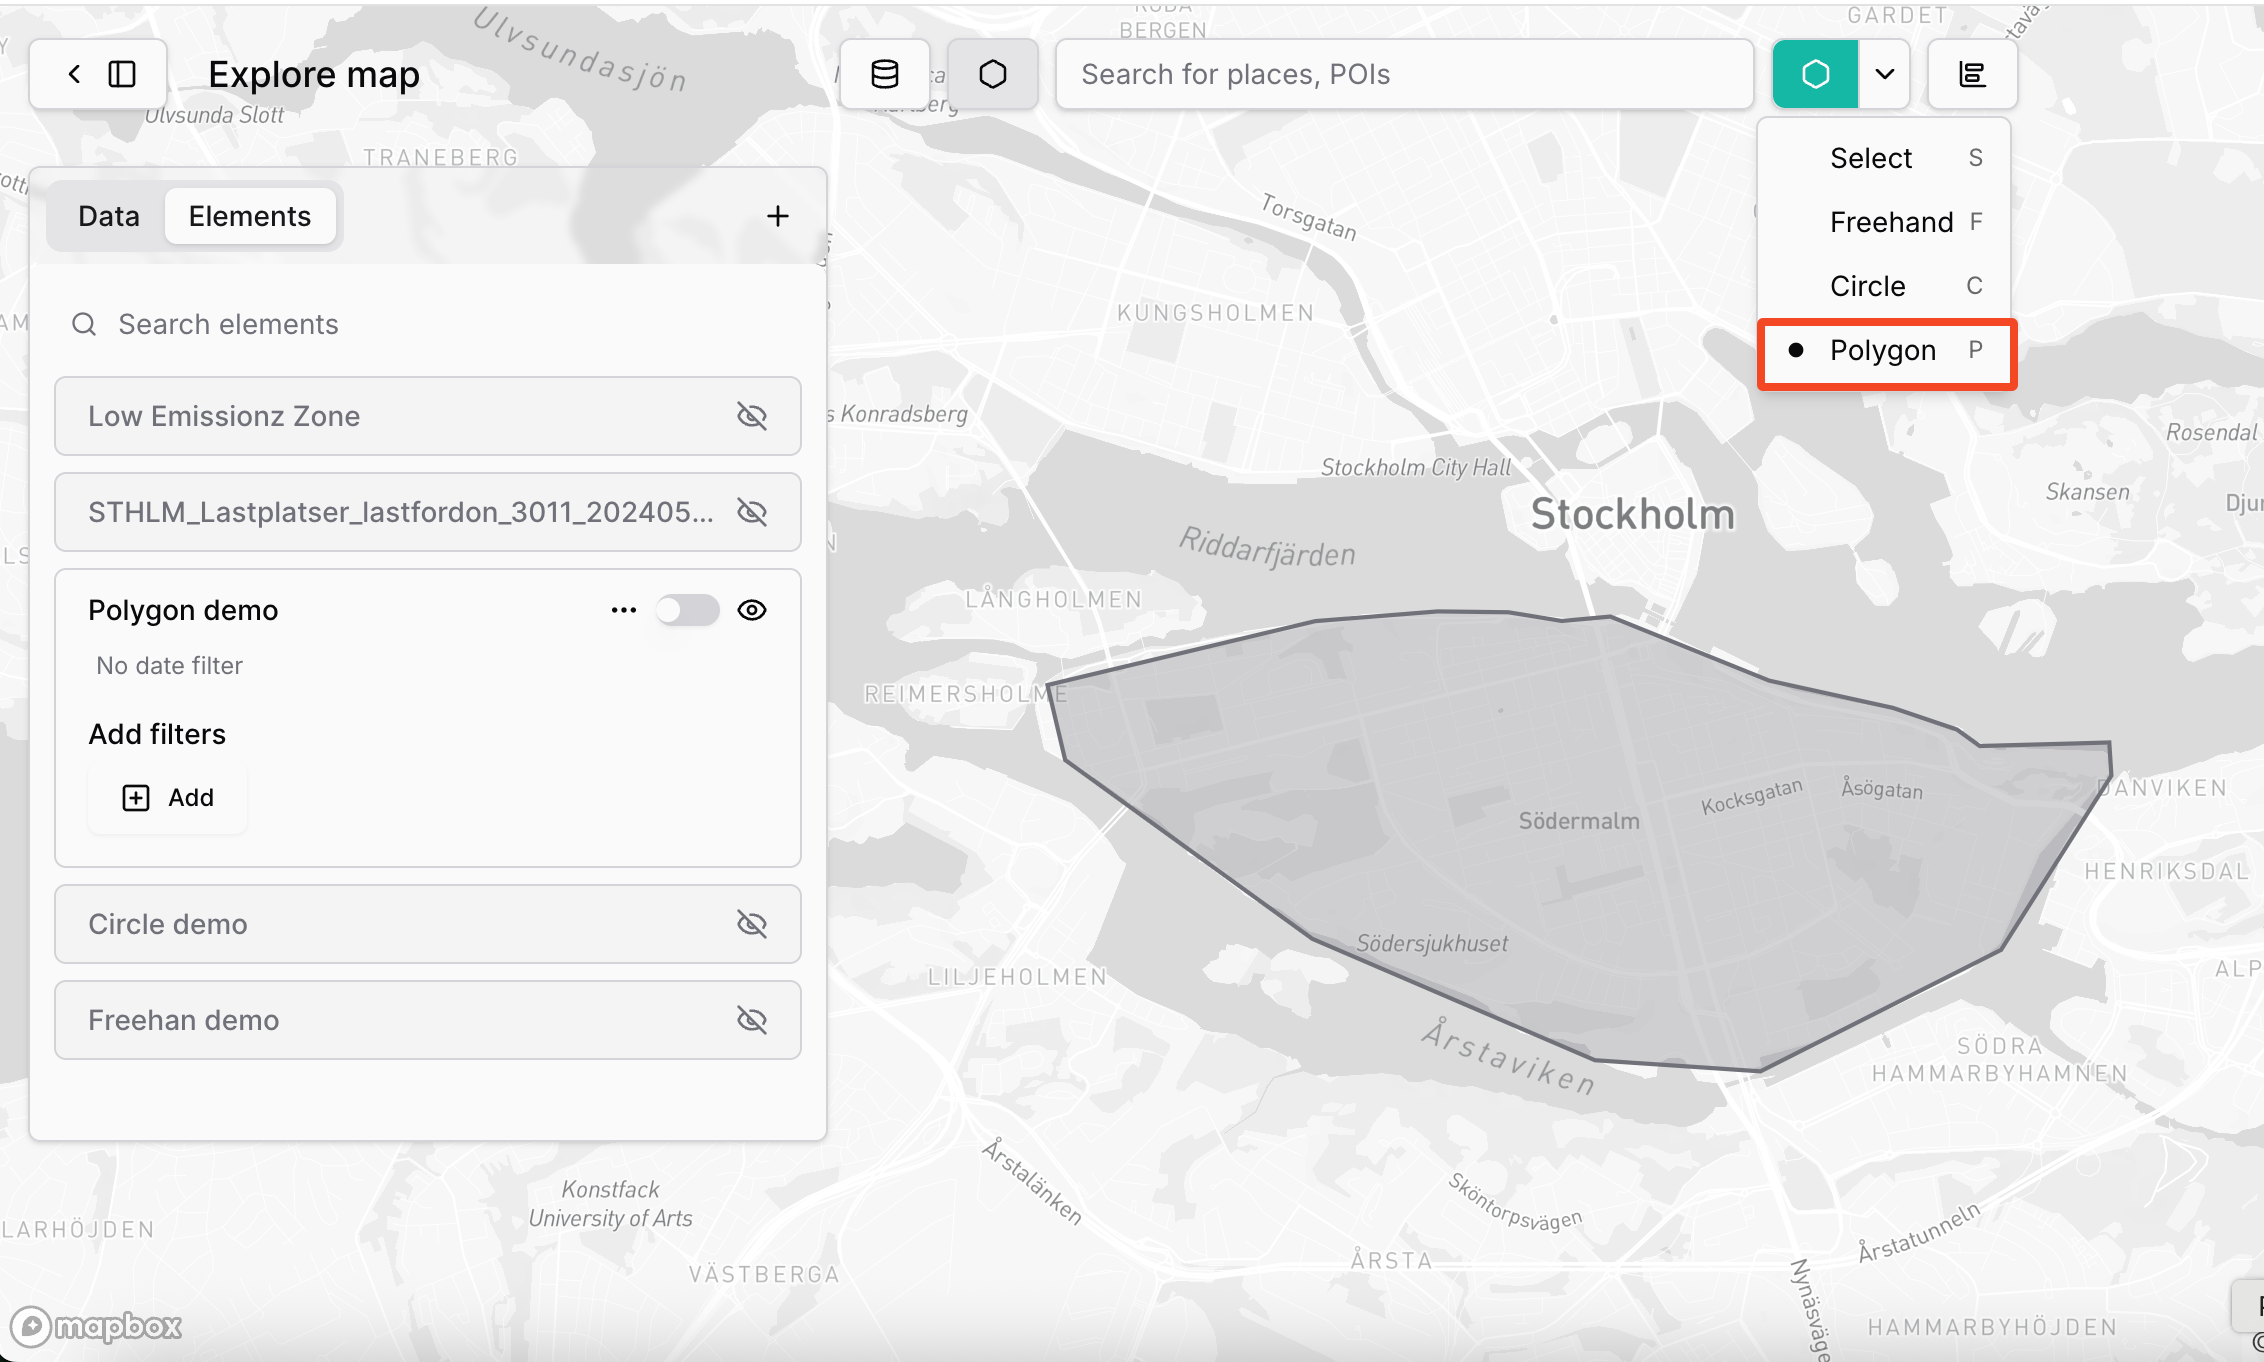
How to Use:
- Select Polygon Tool: Click the polygon icon in the toolbar
- Place First Point: Click on the map to start the polygon
- Add Vertices: Click additional points to define polygon corners
- Create Shape: Continue clicking to add points as needed
- Close Polygon: Double-click or click on the first point to complete
- Adjust if Needed: Fine-tune vertex positions for precision
Element Management Process
After Drawing an Element
- Element Appears as Draft
- Element Naming and Add
- Provide Name: Enter descriptive name for the element
- Click "Add": Confirm element creation
- Element Added: New element appears in Elements panel
Element Activation and Analysis
Visualise
Click the "eye" icon to show elements on map
Masking
Activate Mask: Enable masking to focus analysis on element area
And then you can trigger you analyis :
- Data Filtering: All data layers filter to show only data within element
- Widget Updates: Charts and visualizations update to reflect masked data
- Focused Analysis: Analysis becomes element-specific
Updated 8 months ago