Adding Policies To Cityscope
Basic Policy Design
The Regulation dashboard allows you to digitally translate regulation and road safety rules into the platform. Notably, you can:
- create policies, whether permanent or temporary
- visualize, edit or delete policies
- monitor real-time infringement of these policies
Creation of a new Policy
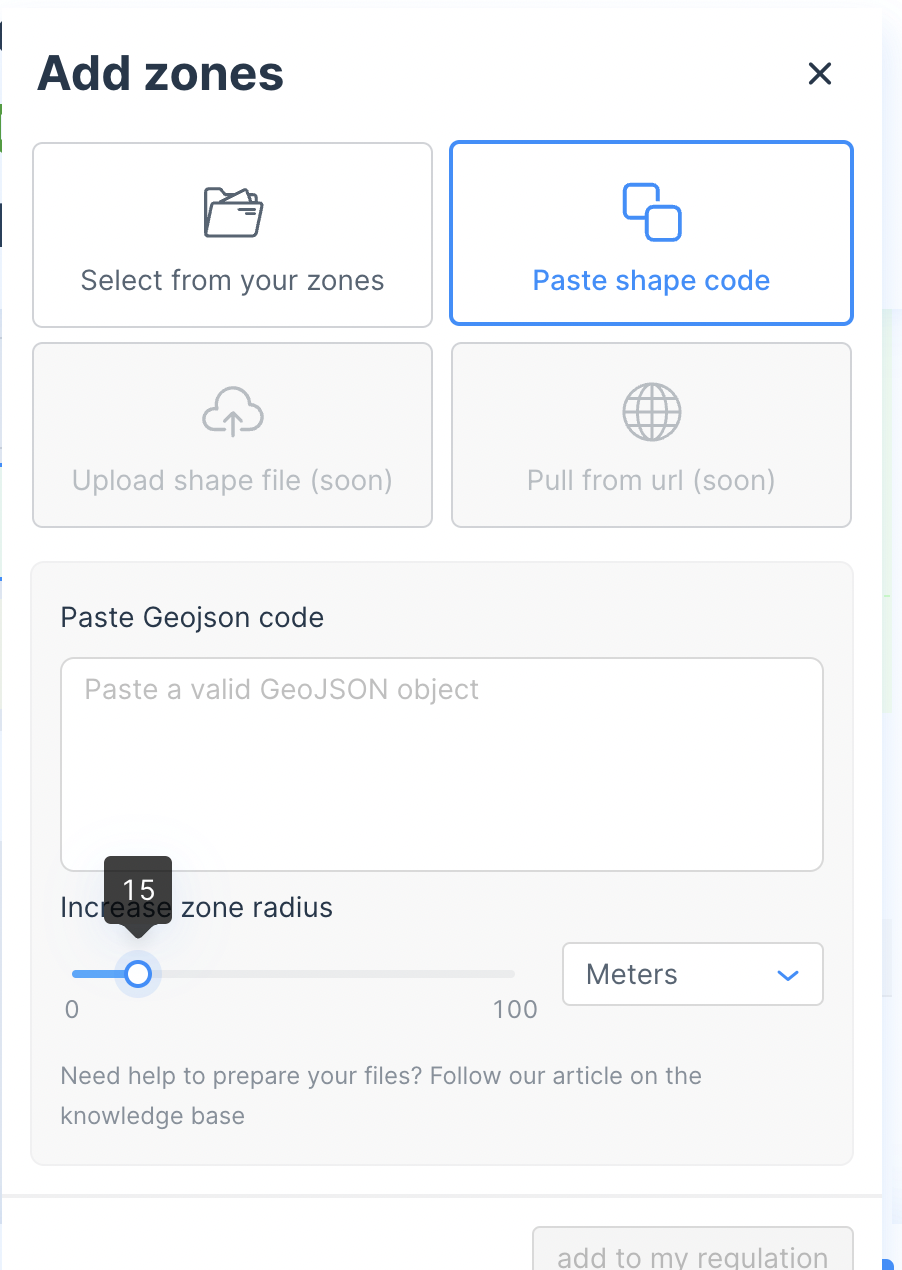
You can easily create policies, based on existing Districts or Sub-Districts, and by simply pasting a valid GeoJSON object. You can also create policies applying to custom zones thanks to the drawing tool.
Policies Parameters
In the process of crafting your policies, several parameters need to be tweaked:
Rule: choose the rule that apply to your Policy, among Parking, Multi-Parking, No Parking, Low Speed, No Go, Cap and floor, Floor, Cap, Max unavailable, Subsidies, Fees
Name: allows you to give a name to your Policy, not too fancy please 🙃
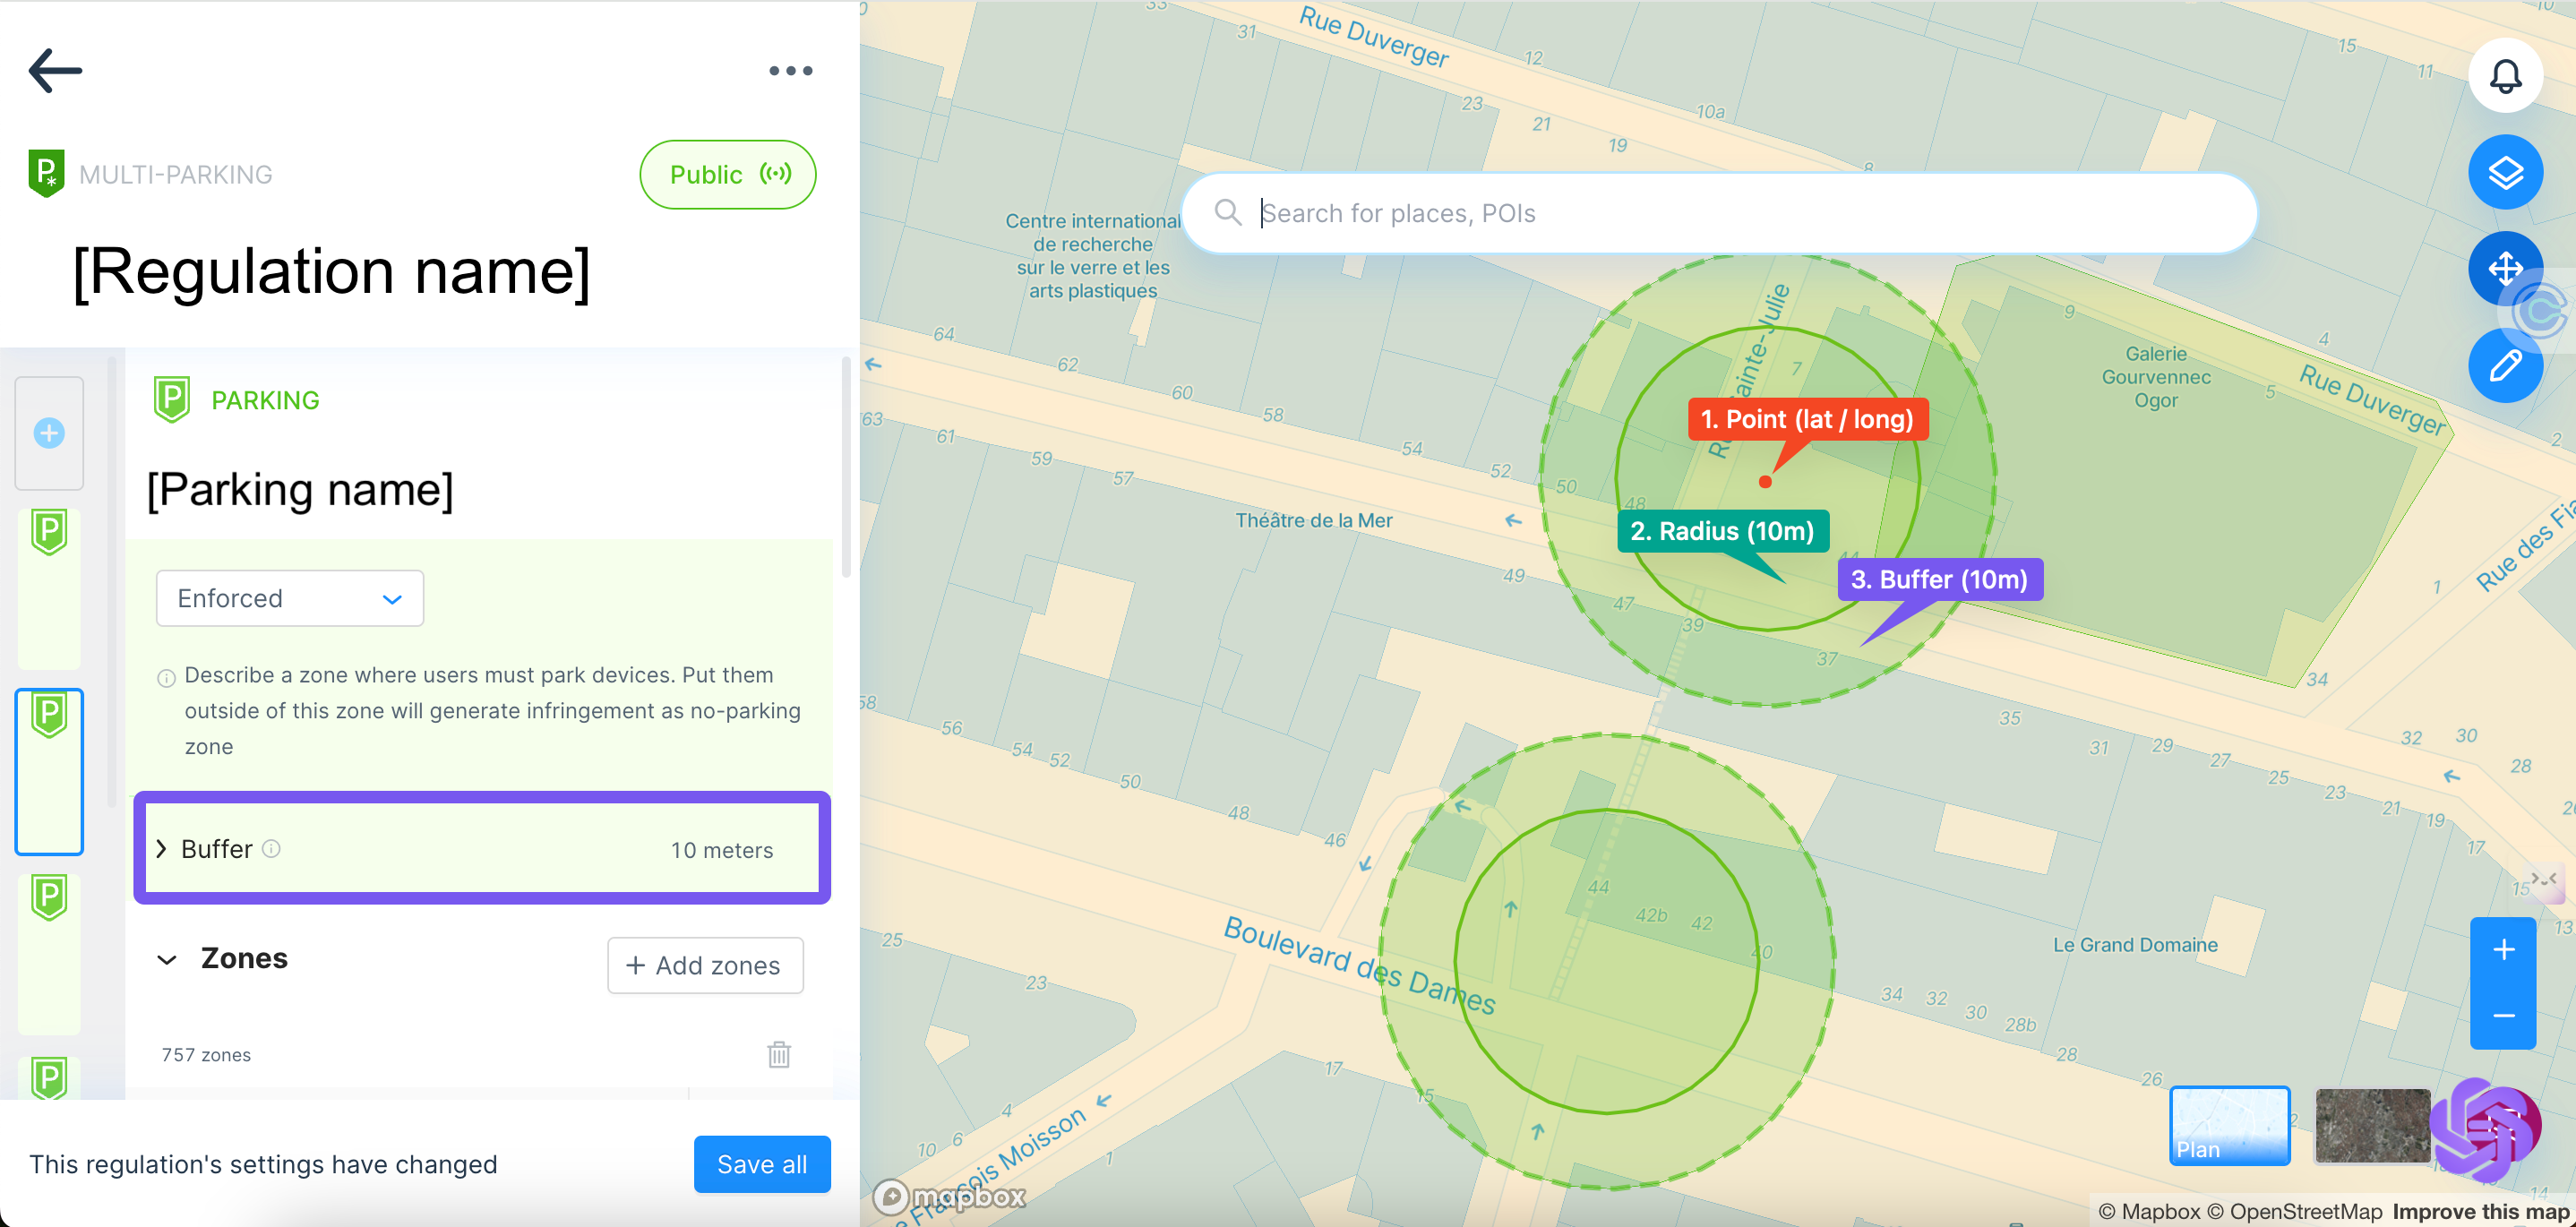
Zones: Vianova employs three primary types of zones: Received Zones, Radius Zones, and Buffer Zones. Each type serves a specific purpose and has its own methodology for implementation.
- Received Zones: a specific geographical area defined by city authorities. These zones are typically provided as points (lat/long) on a map or polygons that outline precise boundaries. If you decided to create a Policy based on existing Districts or Sub-Districts, you simply need to paste a valid GeoJSON object in the dedicated field.
- Radius: The radius will be added at the creation of a new regulation and cannot be modified afterward. This type of zone is essential for accurately representing locations such as parking stations, which cannot be effectively depicted as single points on a map so a radius must be added to create a polygon. In addition, the radius can be increased by at least 1 meter when the geographical precision of the area is uncertain.
- Buffer: A Buffer Zone is an area that extends beyond the original boundaries of a defined zone, and can be modified on the platform easily after the setup. This concept is used to account for GPS inaccuracies and to ensure compliance with regulations.
- Positive Buffer: Extends the zone outward, which is useful for ensuring vehicles are within a compliant area (e.g., Vianova advises a 10m buffer for parking and multi-parking policies).
- Negative Buffer: Shrinks the zone inward, ensuring that vehicles parked just outside the boundary are still considered in violation (e.g., no-parking zones).
- Statistical Use: These buffers help absorb GPS inaccuracies, ensuring that data collected for analytics and compliance is accurate.
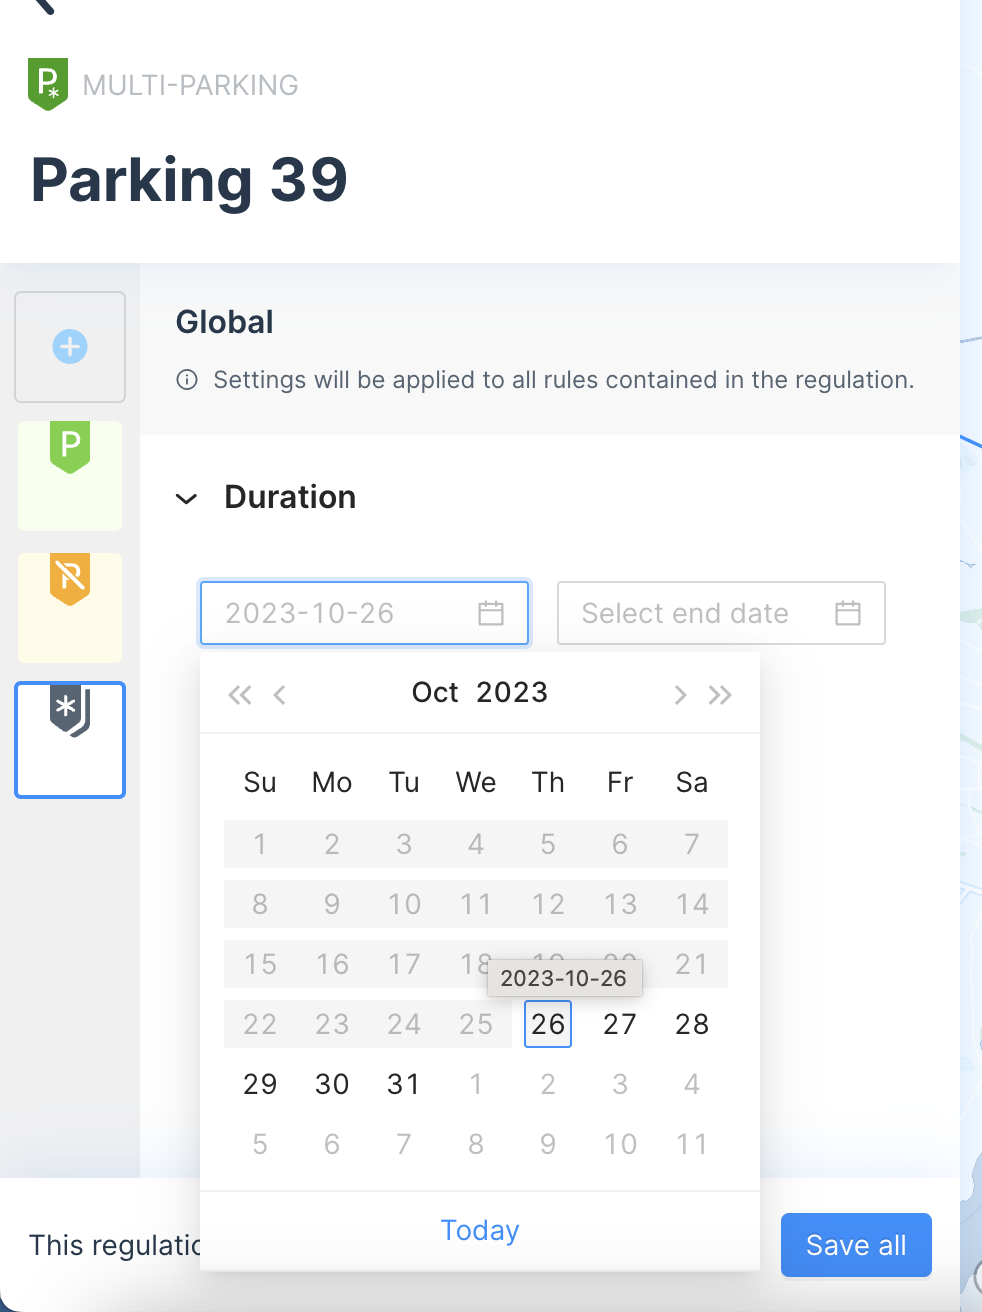
Duration: select a Start Date and potentially an End Date, select a Time Slot or choose All Day, and pick one or several days of the week your Policy should be enforced (M, T, W, T, F, S, S)
Devices: select one or several vehicles types 🚲 🛴 🚗 🛵 affected by the Policy
Drawing Tool
The drawing tool available in the top right corner, easily lets you create custom zones for your policies.
Click on the Pencil icon to launch the drawing tool
Pick your preferred tool between Pen, Brush, Circle
Click on the map in the area of your choice in order to start drawing a shape
You can add several zones within the same Policy by drawing them one after the other
Once your drawing and/or all parameters for your Policy are completed, click on
➡️ Save policy. It will then appear in the list of Policies.
Clipping and Advanced Policy Design
You can use the Multi-Parking feature to create policies that are layered. For example, many cities require no parking in the entire city with the exception of designated parking zones. The Multi-Parking policy type enables you to create these types of policies by giving the parking points priority over the no parking area.
Step 1: Add the base layer of policy by setting a No Parking zone within the policy. You can use the "Zones" to select the entire city, or a certain set of subdistricts.

Step 2: Add the exemption areas (in this case, the location of authorised parking areas) by pasting a geojson into the parking tab of the policy. You can add a buffer to the shape to account for GPS errors (for example, with mobility hubs we typically recommend a buffer of 15-20 meters, depending on the city.
Step 3- Finalize the Policy by setting the start date (and end date if needed).
A companion policy can be created by adding a second policy. In this example, you could add the original GeoJson of parking locations in a second time and name it as authorized parking zones, giving you the ability to begin to collect analytics about which parking hubs are best performing and tracking the origin-destination pairs within the parking zones.
Videos and Additional Resources
Updated 9 months ago